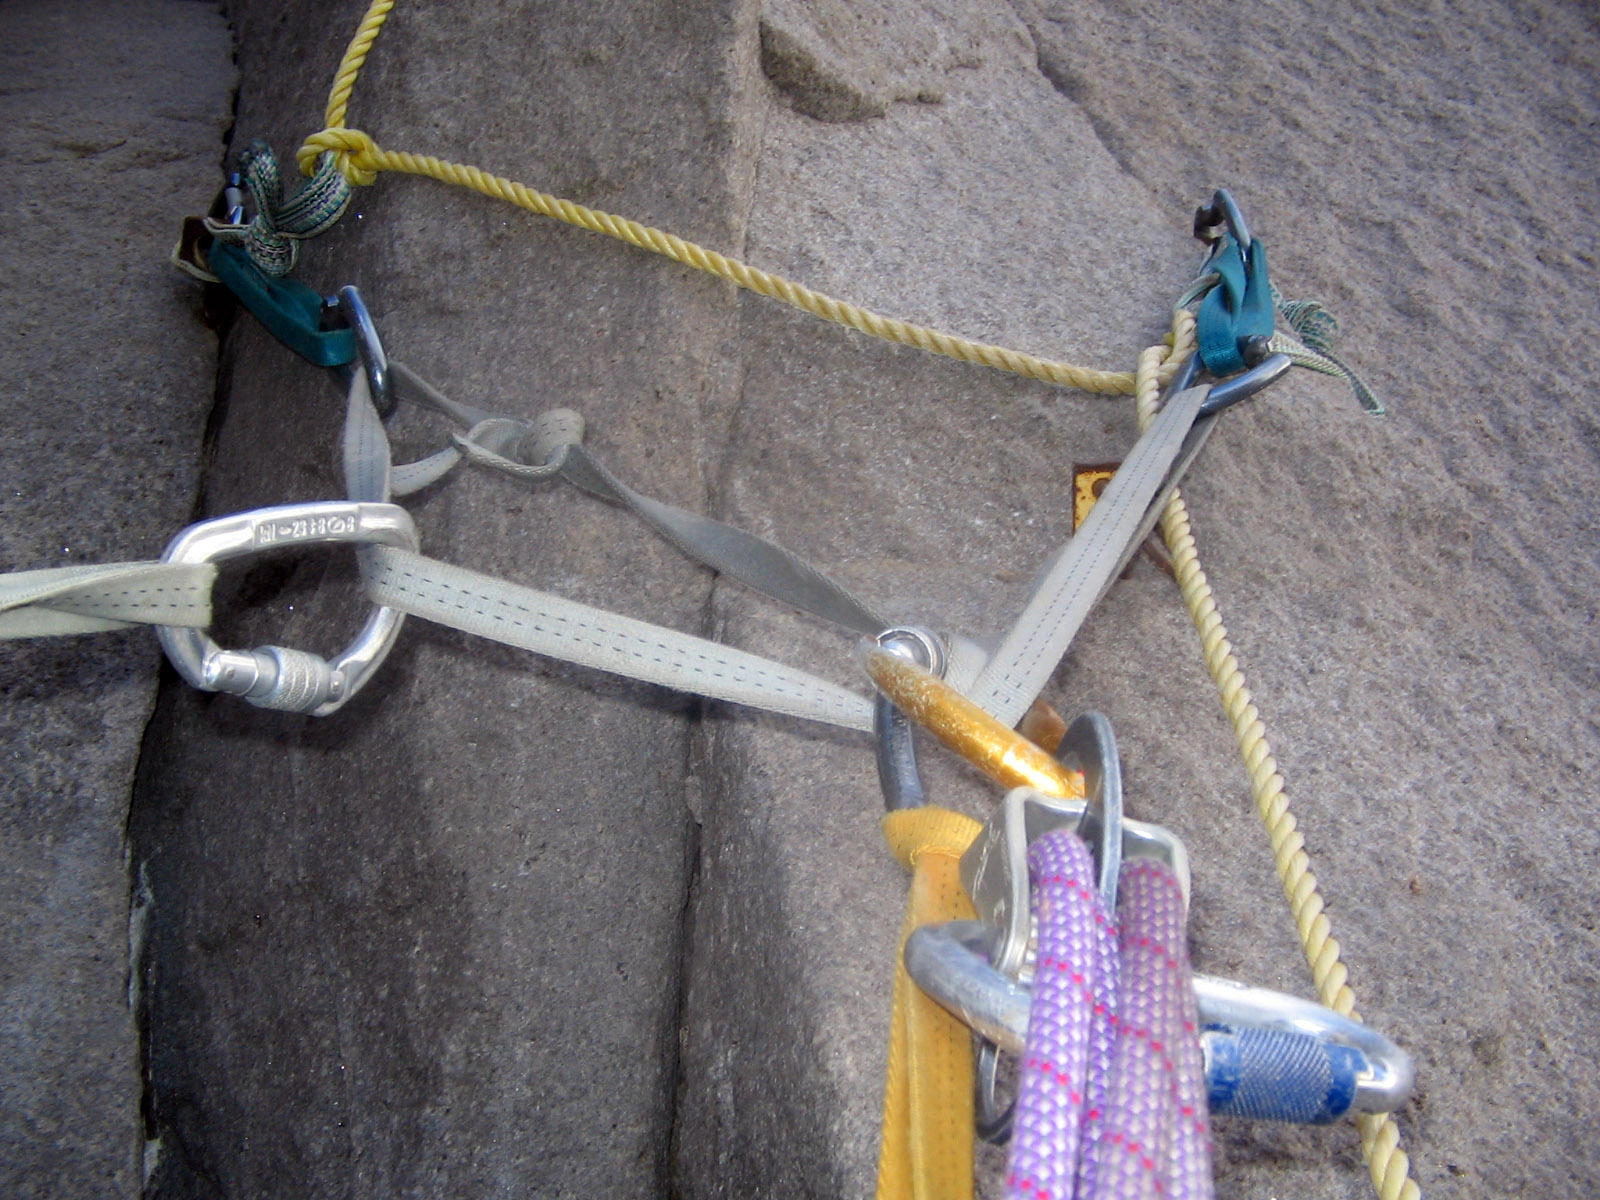
An anchor is the one piece of a climbing system that has no backup behind it. That is why the principles come before the knots: once you understand what an anchor must do and why, the configurations stop looking like a menu of tricks and start looking like answers to a single question.
- Every anchor is judged on the same few qualities: redundancy, equalization, strength and the direction of load.
- Cordelettes, slings and the climbing rope itself can all form the connection, and each suits a different situation.
- Evaluating each placement before you trust it matters more than the configuration you tie.
What does an anchor actually have to do?
A climbing anchor is any device or method that attaches a climber, a rope or a load to the climbing surface. Most of the time its job is fall protection, but the same systems are used for hoisting, holding static loads and redirecting a rope. The surface can be rock, ice, steep dirt or even a building, and the anchor can be temporary or permanent.
That breadth explains why there is no single correct anchor. What stays constant is the logic. A belay anchor is the sole attachment of the belay or top rope to the cliff, so it should be built from several components, none of which is likely to fail, and none of which would bring the whole system down if it did. A useful test follows from that: any one component of a good anchor should be able to hold the entire system by itself.
There is also a reason to take the standard seriously that people often miss. The force an anchor receives can be much greater than the climber’s body weight. Stiff rope and stiff anchor materials, slippage through the belay device and the way some cam-action pieces behave all add to it. You build for the worst loading, not the average one.
What is a natural anchor, and what is an artificial one?
Natural anchors are secure features of the terrain: trees, boulders, lodged chockstones, horns and similar protrusions. You connect them with a sling, a lanyard or a cordelette and a carabiner. Artificial anchors are man-made pieces placed in or fixed to the rock. These include spring-loaded camming devices, aluminum nuts used like chockstones, steel expansion bolts and pitons, and they may be removable or permanent.
The distinction matters because the two ask different questions of you.
- With a natural feature, you judge the feature itself: is it solid, and does it stay put when pulled in the direction the load will come from?
- With a removable placement, you judge both the rock around it and how well the piece sits in it.
- With a fixed bolt, you judge its apparent condition, and you usually have two of them to work with.
Redundancy does not always mean multiplying pieces. A living tree at least 15 centimetres (6 inches) in diameter is generally considered capable of holding several kilonewtons in any direction, which makes it acceptable as a sole anchor. That is a narrow exception, though. Most rock features and any placement you cannot fully inspect call for more than one independent point.
How do redundancy and equalization work together?
When two or more individual anchors join at a main anchor point, you have a load-sharing system. Its purpose is to spread the load across the points, so that no single one carries everything, and so that if one fails the others still hold.
Redundancy depends on independence. Placing every piece in the same crack, or the same flake, gives you several pieces that can fail for a single reason. Choosing separate boulders, separate crack systems or separate features makes the redundancy real.
Equalization is the second half. A system is equalized when the load is shared evenly among its points. You get there by adjusting the length of each connecting member between the main point and its individual anchor while pulling the main point in the direction the load is expected to come from.
One of the more useful acronyms for checking a finished anchor comes from guide instruction: equalized, redundant, no extension, strong, and angle. Running through those five words before you commit weight is a habit worth building.
Which configuration suits which situation?
Cordelettes, slings and static ropes are all used to connect and equalize points, and instruction typically covers two- and three-piece equalized systems, quads and triple quads. Which you choose depends on how many points you have and what you want to hang off the end.
If you want a single master point to bring up a second climber or hang a belay device from, a cordelette or sling system gives you one clean place to clip. That is the main reason to use one when you are not swapping leads. When you build with a cordelette, the knots joining its ends deserve attention too. Instruction favours knots such as the Flemish eight or double fisherman’s and warns against a flat figure eight or other knots that can capsize under load.
On bolted, side-by-side anchors, you can leave the cordelette behind and use only the rope you are tied into plus two carabiners. Some experienced climbers prefer this because it is simple, clean and light. It also puts dynamic rope into the system, which adds stretch and lowers the force on the other components. That can help when the climbing above is hard and runout, and a leader fall could load the anchor heavily.
Two knots work for tying directly to a two-point anchor:
- The bowline on a bight is easy to learn, quick to tie and simple to inspect, and you can size each loop to equalize the points. A bowline can loosen when used to secure a rope end, but here the end is attached to your harness and cannot pull through.
- The bunny-ears figure eight lets you slide the loops to different lengths when one bolt sits higher than the other, but only while the knot is loose. It has been tested repeatedly and remains redundant.
This approach suits partners who swap leads each pitch. If one person leads every pitch, a sling or cordelette with a single master point is usually easier.
How do you evaluate a placement before you trust it?
The configuration only matters if each point is sound. Guide instruction breaks placement evaluation into a four-point check: rock quality, crack shape, how much of the device is cammed, and whether all four lobes of a cam are in good contact with the rock. A piece that fails any of those checks is a weak point no matter how neatly it is tied in.
A practical decision sequence for an unfamiliar crag follows from this:
- Look at what the terrain offers: trees, boulders, bolts, cracks. Decide whether you need one point or several independent ones.
- Test the rock around every candidate.
- Place each piece and check it against the four points above, ideally with a partner checking independently.
- Connect the points, adjusting lengths to equalize in the direction the load will come.
- Check the angle, the absence of extension, and that the loss of any single point leaves the system standing.
Two cautions for belayers. Attach yourself to the anchor through the belay loop at the front of your harness. Loading the back of the harness can cause it to constrict front to back, which risks serious pelvic injury. And remember that a belay system where the rope runs directly from the climber to you, with no separate attachment to the anchor, gives you no way to escape the system, which is why it is mostly used on climbing walls.
Reading about this is a start, but the skill is physical. A course with a professional guide, where you place gear and have a trained eye critique it, is the fastest way to turn the principles into judgment.
Related reading
- Red Rock Canyon: Sandstone, Long Routes and the 24-Hour Rain Rule
- How Climbing Grades Work: YDS, French, UIAA, V-Scale and Font
Sources
- Use the rope to make an anchor – 2 knots (alpinesavvy.com, accessed 2026-11-09)
- Anchor Building Course for Rock Climbing (stone-adventures.com, accessed 2026-11-09)
- Anchor (climbing) — Wikipédia (en.wikipedia.org, accessed 2026-11-09)
Photo: File:A climbing anchor embedded on Alam Kuh.jpg, by user:رضا قاسمی, CC BY-SA 4.0 (Wikimedia, via Openverse)